Further Down the Car Audio Rabbit Hole


I just want a volume knob!

In my last post I went on a trip down memory lane when I eventually mentioned considering “re-installing the stock equipment” on my old car to prepare for sale. This quickly turned into cleaning it up and spending even more money on car audio instead.

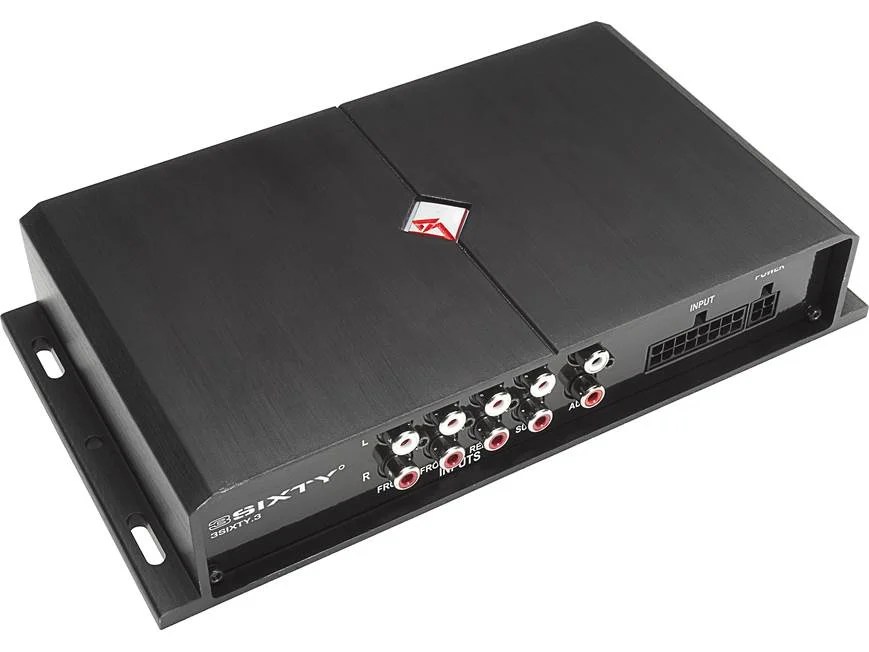
The last working versions of my car sound revolved around a Rockford Fosgate 3Sixty.3 DSP. The stock door speakers were bi-amped and the DSP let me use a 4-channel amp to power them without adding any passive crossovers. Unfortunately, the DSP no longer powers up, so I started to catch up on what a modern replacement would look like.

Instead of spending a bunch of cash for another DSP in a car which I barely drive, I ended up looking for head-units that had onboard 2-way/3-way crossover mode, Android Auto, decently hot pre-outs, and a volume knob.
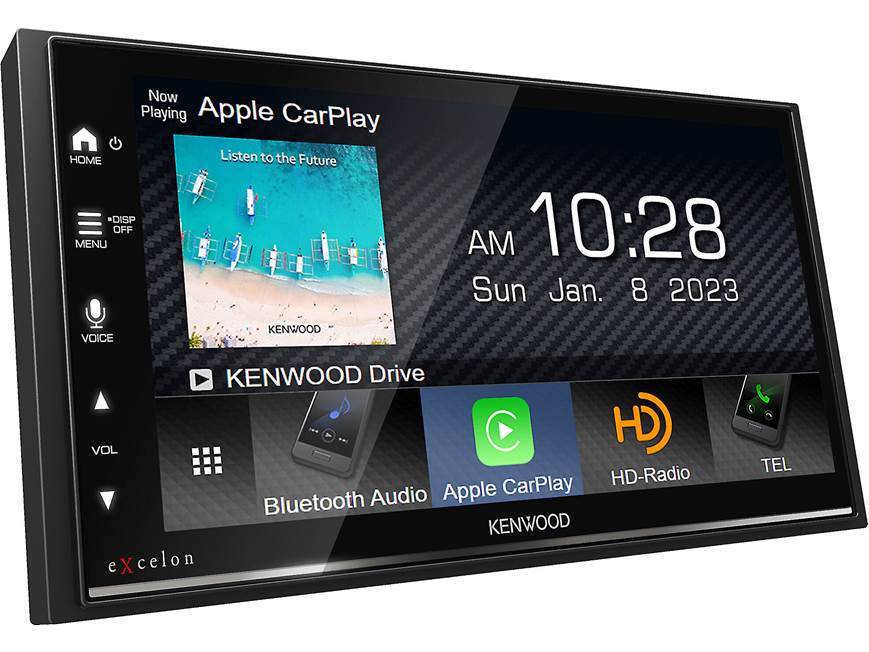
To spare you from all of the mind numbing comparisons, I’ll skip ahead to me landing on a Kenwood eXcelon DMX809S. You might notice that it doesn’t have that volume knob I wanted. While choosing the right radio, I learned that not many units would fit the other requirements AND have a knob. So I decided I’d just add a knob myself, how hard could it be?

I knew from previous radios that the wired remote control input wire was just a ladder of different resistors, so I started buying components to fit this assumption. An Arduino Pro Micro (ATmega32U4), a pack of EC11 Rotary Encoders, and a digital potentiometer seemed like they would be a good combo, so I ordered and waited.

The assumption was wrong

When I eventually sat down long enough to research the values and start writing the software, I learned that the Kenwood doesn’t use resistor values like Pioneer or Sony radios do. It instead accepts NEC IR codes pulsed on the remote control wire.

This is the part of every hardware project that I never account for going in. The thing I assumed was the whole project — a ladder of resistors and a digital pot to fake it — turned out to be the one thing this radio didn’t want. And the thing I assumed was trivial, getting an ATmega32U4 to bit-bang NEC timing cleanly on an open-drain pin while simultaneously watching a rotary encoder on hardware interrupts, is where all of the actual work went.

The digital pot didn’t go to waste, though. Since the code had to be written anyway, it made sense to support both output paths: bit-banged NEC for the Kenwood, and an MCP4151 digital potentiometer over SPI for the Pioneer and Sony units that really do want to see a physical resistance change. One box, either kind of radio.

And since the Arduino has ADC inputs sitting right there, I also put it to work converting the car’s analog (resistor ladder) steering wheel buttons into NEC commands to control the radio. The assumption I started with turned out to be true — just on the input side of the box instead of the output side.

Handing over the reins

After some quick proof-of-concept work proving I could get the Arduino to reliably read a rotary encoder and read specific ADC values off the steering wheel, I handed the reins to an AI to re-implement the whole thing.

I want to be specific about what that means here, because it isn’t the same thing it means in my next post.

This was a project I was entirely capable of writing myself. I knew what the architecture should be, I knew what the edge cases were, and I essentially dictated the thing I would have built and had the agent type it. That’s the honest description: not “the AI designed this,” but “I described my own implementation out loud and something else did the keystrokes.” Where it earned its keep was in the surrounding scaffolding I would have been too lazy to build for a one-off box:

  • A Nix development environment via Google Antigravity, so arduino-cli and the AVR toolchain stay pinned instead of rotting
  • A wiring diagram written in Mermaid, with SVG generation wired into the build steps, so the diagram can’t drift from the documentation
  • A non-blocking serial CLI at 115200 baud, so the button-to-command mapping can be re-tuned and saved to EEPROM in the car, with a laptop on the passenger seat, instead of by reflashing
  • Configuration expressed in real-world ohms rather than raw ADC values, with the ADC windows calculated from the pull-up — because future me will not remember what 412 meant
  • Presets, so a GM ’04-’08 button map loads in one command

None of that is clever. All of it is the kind of thing that turns a proof of concept into something another person could actually use, and all of it is the kind of thing I historically skip.

The other thing I did before letting it write anything: I sat down and wrote it a rules file. This is a Nix project. Don’t run builds on the host. Always go through nix develop. Respect the memory and feature constraints of an ATmega32U4.

In the car

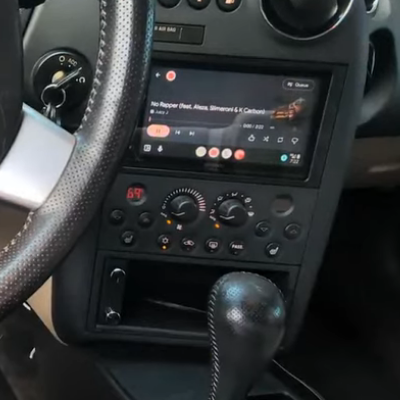
I used matching knobs to combine the rotary encoder and an analog volume knob (for the bass amp) in a project box similar enough to the wired remote from the Fosgate DSP that it feels the same to use.

After much back-and-forth and several re-writes, I finally deployed the adapter in the car. I turn the knob and the volume goes up. That’s the whole feature. That’s the entire thing I set out to build. It was completely worth it.
What’s next

Six weeks after I finished this, I started another project the same way, and it did not go the same way at all.

That one is an M5Stack Cardputer ADV that controls my house through Home Assistant, and the difference isn’t the hardware. On this project I dictated an implementation I already had in my head. On that one I handed over a vision and shaped the result, and I have barely looked at the code. It went about forty times faster and I understand it differently. Not less, exactly, but differently, and I’m still working out how I feel about that.

That’s the next post.

A 25-Year Quest for the Ultimate CarPC

The idea of putting a desktop computer in a car has been in my head since before I was old enough to drive. I can’t remember what I found first: the specialized software, the build logs, or the legendary mp3car.com forums.

In the early days, solutions were either primitive or prohibitively expensive. By the time I had my first car at 16, I purchased an Alpine CDA-9811 head unit that could play MP3-CDs. But 700MB just wasn’t enough for me. I wanted my whole library.

The Trunk PC Era

Using an adapter in the AiNet port in the back of the Alpine, I connected to the sound card of an micro-ATX computer tucked in my trunk, powered by a cheap power inverter. I created my own low-tech solution for power management: two simple relays. One powered by the head unit’s remote wire, and the other by the computer’s power supply. As long as one of the two was on, the PC would stay powered. This let the inverter keep running after the car shut off, until the PC would shut down. I used the serial port RTS pin connected to the remote wire which signaled the PC to shut down when the head unit turned off, by now the details of what software I used for that are fuzzy. It was running Windows XP and Winamp, of course.

I couldn’t afford an in-dash display yet, but I had a Sony Ericsson T616. It couldn’t play MP3s (though it did let me load any MIDI file I wanted as a ringtone!), but it had Bluetooth. I found a Winamp plugin that presented a standard Bluetooth menu to the phone, allowing me to wirelessly control the PC in the trunk from the driver’s seat.

It was a total pain. Troubleshooting meant lugging a 40-pound CRT monitor out to the driveway to check BIOS settings. I remember once having that CRT buckled into the back seat while I went through a Taco Bell drive-thru. A friend working the window just looked at the glowing monitor and sighed:

“Of course you’d do that, Timmy.”

The “Fine” Years and the Rise of Streaming

My next step was a Nokia6620 that could play OGG files. I had to order a hand-built proprietary cable just to get an 3.5mm connection and spent a small fortune on a high-capacity MMC card. It was… fine.

Eventually, I moved to an AT&T Tilt 2 with 3G. That changed everything. I set up a Subsonic server at home and started streaming my music collection directly to the car. But the “CarPC fever” hadn’t broken, I just still didn’t have money to do it right.

The Peak: Windows in the Dash

Around 2012 I got a new-to-me car and decided to go all-in. I bought a low-power mini-pc, a long VGA cable, a dedicated double-din touchscreen, a DC-to-DC power regulator, and an extra battery. After struggling with a resistive screen, I found a capacitive upgrade that actually felt modern, but the wiring and power management was a headache. I drained that new battery so many times to the point of ruining it.

The masterpiece was an 8-inch Windows 10 tablet wedged directly into the dashboard. I found an adapter to map my steering wheel controls to Windows, stashed a 1TB hard drive behind the dash, and integrated the factory microphone so I could talk to Cortana. I had full Windows Maps and a desktop OS at my fingertips.

To handle power control, I used what I already had. Since it was a tablet with a battery now, I just connected the 5v adapter to switched accessory power and cobbled together an app that would automatically put the PC into sleep mode when it stopped charging. Since the tablet already woke itself up when charging started, I just had to simulate moving the mouse a bit to keep it awake.

It was exactly what I had dreamed of at sixteen. It was perfect.

The Boring Success of Today

But hardware in a car lives a hard life. Heat and vibration are the enemies of the tinkerer. Eventually, the tablet setup started to show its age, Microsoft discontinued Windows Maps navigation and “Hey Cortana,” I eventually replaced the OS with Android x86 and replicated most of the features, but it started to feel more like a chore. I don’t drive the car very much anymore, and my only plans for the car currently are re-installing the stock equipment to get it ready to sell.

My current work truck has CarPlay and Android Auto. I pay for YouTube Music. I did manage to geek it up a little bit by using a Raspberry Pi Zero to make the Android Auto wireless, but there’s no trunk-mounted towers, and no CRTs in the backseat. It just works.

I finally have the “perfect” car computer I spent twenty years trying to build, and it turns out it’s incredibly boring. I miss the troubleshooting. I miss the proprietary cables. I miss the fight to make the music play.

Because as it turns out, the joy wasn’t in the listening—it was in the building.

Malware? Don’t jump to conclusions!

Tonight I had a bit of a scare thanks to jumping to conclusions from the first Google result.  I thought it might be a good idea to drop a reminder here to take a step back and remember that .bash_history is a thing.

While I was inspecting /etc/passwd on a new Ubuntu server to confirm a home directory, I noticed a new line at the bottom I had never seen.

uml-net:x:111:120::/nonexistent:/usr/sbin/nologin

What the heck is that?  Searching Google brought me to this:
https://askubuntu.com/questions/896040/why-do-syslog-and-uml-net-have-home-in-etc-passwd/896049 specifically https://askubuntu.com/a/1151118

Crap.  This was a relatively new install, did it already get owned?  I didn’t see any suspicious processes running or notice any slowdowns.  Do I need to re-image this machine?  How did it happen?  WHAT happened?

Running apt search uml confirmed it was actually installed.

Wait, did I install it myself?

A search in .bash_history revealed that yes, I installed it as a prerequisite while following the guide at https://github.com/kholia/OSX-KVM a few nights back.  False alarm.

Finding The Perfect Bluetooth Headset

While I work I like to have one earbud in for listening to background music or podcasts, and for a few years I’ve been buying various Plantronics bluetooth headsets such as the M50 and M70.  They provided a cheap solution for long battery life (7+ hours) of audio in one ear.  After I accidentally put my M70 through the wash one too many times (yes it survived more than once) I decided to start looking at stereo solutions.

I first tried a $30 no name brand and even though I wasn’t expecting them to sound amazing, they were completely un-listenable and uncomfortable, so I started browsing.

After reading a bit I was becoming interested in an active noise canceling headset, so to start out I picked up the JLAB Audio Epic Executive from the shelf at the local Best Buy.

When I opened the box I wasn’t really getting a high-quality vibe.  The wire had big kinks where it was tightly bent in the box, which made putting the flimsy neck band challenging, They sounded great, claimed 11 hours of battery life with active noise cancellation off, 7 on.  I though this should easily get me through a work day, but before the work day– less than 12 hours after purchasing–  the left channel started crackling and cutting out.  So back to Best Buy I went.

This time I decided to spend a bit more money and picked up the Jabra Elite 65e.  Jabra has been around a long time so I thought build quality had to be well above the JLAB.  Besides active noise cancelation, they also feature passthrough mode, an app to customize settings and EQ, a solid neck portion, and 13 hour battery life.

Since I was paying twice as much this time I made a decision I rarely make, to purchase the protection plan. Any other time that I’ve made this decision, the product has far outlasted the plan, thankfully this didn’t go to waste this time.

Opening the Jabra confirmed my suspicion of higher build quality.  The packaging was premium and matched the contents.  Once I picked the right combination of tip and wing they fit comfortably and had excellent sound quality.

The buds on the Elite 65e are magnetized and would stick together when not in use, which would also pause the audio.  This was good, because the pause button wasn’t easy to find.  The right side of the neck section had 3 buttons that were the same size, but the textures weren’t different enough for my callused fingers to identify without counting.

The noise cancellation was by no means perfect, but when in a loud server room or next to an air conditioner, they worked great.  It was easy to activate with a dedicated button on the neck section, and holding the same button turned on the pass-through mode, which I found myself using more than the noise cancellation.

I thought I finally found the one, and it was bliss.  For about 2 months I carried them everywhere I went.  The charge always lasted the day.  I kept them paired with my phone all day and was able to connect my laptop and watch videos for the rest of the evening.

Now for the bad, I noticed one day that one channel started making loud static when I turned on pass-through mode.  Moving the wire would exacerbate the problem.  It seems that one of the wires leading to the mics used for noise cancellation and pass through had broken.  I was past the normal return period, but thankfully I purchased the protection plan, so back to Best Buy I went again.

I debated with myself if I should choose another this time, but when they worked I loved them so much, so I opted to pick up another Elite 65e.  I was pretty shocked when I was asked if I wanted another purchase plan.  I assumed that the year I purchased would cover the product for a year, but I was wrong.  As much as I wanted to say no, I said yes, spent another 40 bucks and walked out the door again.

The new set worked great for a little over a month, and the same issue occurred.  I was saddened, but I just lived with it for a while.  Since I had a year to go back, I figured I would wait until something better came out.

After another month, I decided to go back to Best Buy and get store credit and pick out another product.  I was amazed that I was actually refunded the purchase price of the protection plan well after the normal return period.  I’m not sure if this was a mistake or a kind employee, but I didn’t question it.

I decided to go a different route this time.  I picked up the Apple AirPods, for some reason.  They don’t do active noise cancellation, they don’t even seal off the ear or offer changeable tips, just one size hope it fits all.  I don’t use an iPhone or a Mac, and I don’t like the design.

But they are comfortable, and very well engineered.  They seem to be the only fully wireless earbuds to seamlessly let you choose the left or right bud and have everything work normally.  Since a lot of the time at work I only want one in, I could easily listen to one while the other charges.

I wore them to work for one day, and almost he entire day I felt self-conscious wearing them.  I’m not necessarily anti-apple, but I’m very much not an Apple person.  When I got home I had a gift for my iPhone, Mac, and Apple Watch loving girlfriend.

So, again, I was back at the drawing board.  Now that I had a taste with the AirPods, I’m pretty hooked on the idea of the truly wireless buds.

I started looking around.  I found the somewhat recently released Rowkin Charge+ which looked very interesting to me.  The charge case has Qi charging and USB-C, and it even doubles as a battery pack I can charge my phone with.  I went and picked them up with very little research.

So far they’re working and sounding great for me.  When they’re pulled out together they pair up quickly.  Each can be used individually once you pair them.  Overall I’m happy with the purchase.  If anything changes I’ll be back to update the post.

Linux Software RAID Quick Reference

Create A RAID-1 Array
mdadm --create /dev/md0 --level=1 /dev/sda /dev/sdb

Scan For Disks
mdadm --detail --scan

Add Disks To mdadm.conf
mdadm --detail --scan >> /etc/mdadm/mdadm.conf

Check Status
cat /proc/mdstat

Mark Disk as Failed
mdadm --manage /dev/md0 --remove /dev/sda

Remove Failed Drive
mdadm --manage /dev/md0 --fail /dev/sda

Add Disk To Array
mdadm --manage /dev/md0 --add /dev/sda